简要介绍下Hexo搭建博客的相关知识,主要内容如下
- Hexo的安装、使用、发布
- NexT主题安装与配置
- Hexo优化
详情文档参考请移步至 Hexo中文网
安装
环境
系统:Win8 64bit
Node版本: v0.12.0
Hexo版本:3.1.1
Git版本: 1.9.5.msysgit.1
安装HEXO
npm install hexo-cli -g //下载hexo包 |
用浏览器打开 http://localhost:4000/ 或者 http://127.0.0.1:4000/就能看到网页了
推荐使用现代化浏览器(Chrome)获得最佳效果
按 Ctrl+C 停止本地预览服务
使用
hexo的目录结构
. |
全局配置 _config.yml
配置文件的冒号’:’后面有空格
# Site #站点信息 |
命令行使用
常用命令
hexo help |
复合命令
hexo deploy -g #生成加部署 |
简写
hexo n == hexo new |
安装插件
<plugin-name> 为插件名npm install <plugin-name> --save #安装
npm update #升级
npm uninstall <plugin-name> #卸载
安装主题
<repository> 为主题的 git 仓库, <theme-name>为要存放在本地的目录名git clone <repository> themes/<theme-name>
修改主题配置theme: <theme-name>
编辑文章
hexo new "标题" 或者 hexo n 标题 |
在_posts目录下会生成文件 标题.mdtitle: 标题
date: 2015-09-20 13:18:46
tags:
- 标签1
- 标签2
- 标签3
categories: [分类1,分类2,分类3]
正文, 使用 Markdown 语法书写
编辑完成后保存,hexo server 预览
发布
可以部署到GitHub或Coding
发布到GitHub 项目主页需要把 branch 设置为 gh-pagesdeploy:
type: github
repo: https://github.com/git-lt/blog.git
branch: master
或者 发布到Codingdeploy:
type: git
repo: https://git.coding.net/coderlt/blog.git
branch: master
发布hexo deploy
出现以下提示说明部署成功[info] Deploy done: github
NexT主题
安装
到hexo博客项目目录, 从git上下载next主题git clone https://github.com/iissnan/hexo-theme-next themes/next
全局配置文件中 _config.yml 中 theme 改成 next
目录结构
. |
主题配置文件
主题 NexT 的配置menu: #菜单
home: / #首页
archives: /archives #归档
about: /about #关于
#commonweal: /404.html #公益404
#tags: /tags #标签
#categories: /categories #分类
# 小图标
favicon: /favicon.ico
# 默认关键词
keywords: "-_^"
# 留空使用默认的, false 禁用, 也可以写指定的地址
rss:
# Icon fonts
# default | linecons | fifty-shades | feather
icon_font: default
# 代码高亮主题 https://github.com/chriskempson/tomorrow-theme
# normal | night | night eighties | night blue | night bright
highlight_theme: normal
# MathJax Support #数学公式
mathjax: true
# Schemes #启用主题中的主题Mist
scheme: Mist
# 侧边栏
# - post 只在文章页面显示
# - always 所有页面显示
# - hide 隐藏
sidebar: always
# 自动滚动到"阅读更多"标记的下面
scroll_to_more: true
# 自动给目录添加序号
toc_list_number: true
# 自动截取摘要
auto_excerpt:
enable: false
length: 150
# Lato 字体
use_font_lato: true
# Make duoshuo show UA
# user_id must NOT be null when admin_enable is true!
# you can visit http://dev.duoshuo.com get duoshuo user id.
duoshuo_info:
ua_enable: true
admin_enable: false
user_id: 0
#admin_nickname: ROOT
## DO NOT EDIT THE FOLLOWING SETTINGS
## UNLESS YOU KNOW WHAT YOU ARE DOING
# 动画
use_motion: true
# Fancybox 看图插件
fancybox: true
# Static files
vendors: vendors
css: css
js: js
images: images
# Theme version
version: 0.4.5.1
全局配置文件
blog/_config.yml 添加如下配置favicon: /favicon.ico
language: zh-Hans
links_title: 友情链接
links:
Hexo: http://hexo.io/
主菜单设置
menu: |
标签云 页面
命令hexo new page tags
页面设置title: tags
date: 2015-09-19 22:37:08
type: "tags"
comments: false
关于 页面
命令hexo new page about
页面设置title: about
date: 2015-09-19 22:37:08
comments: false
About Me #这里编辑 '关于我' 的内容
分类 页面
命令hexo new page categories
页面设置title: categories
date: 2015-09-19 22:37:08
type: "categories"
comments: false
文章摘录
NexT 支持三种方式来控制首页文章的显示方式
- 在文章中使用
<!-- more -->手动进行截断 - 在文章的 front-matter 中添加
description, 内容为文章摘要 - 自动形成摘要, 在主题配置文件中添加
auto_excerpt:
  enable: true
  length: 150 #默认截取的长度为 150 字符
优化
多说评论和分享
全局中添加配置# 启用多说
duoshuo_shortname: xxx
# 多说热评文章 true 或者 false
duoshuo_hotartical: true
# 多说分享服务
duoshuo_share: true
duoshuo_shortname 为在多说中创建的短域名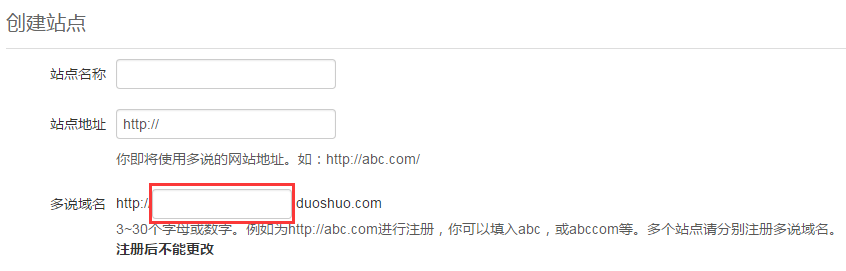
在文章开启和关闭评论
文章头部配置front-matter中添加comments: false/true
百度统计
登录 百度统计, 定位到站点的代码获取页面复制 hm.js? 后面那串统计脚本 id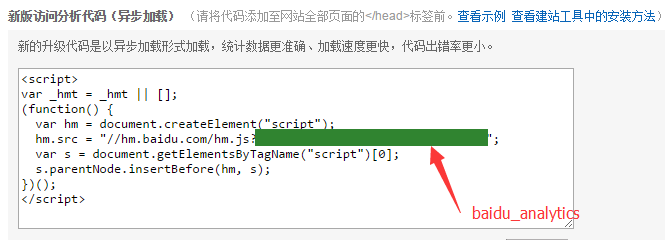
baidu_analytics: xxxxxxxxxxxxxxxx
自定义404
在主题next/source目录下新建404.html 腾讯公益404页面
<html>
<head>
<meta http-equiv="content-type" content="text/html;charset=utf-8;"/>
<meta http-equiv="X-UA-Compatible" content="IE=edge,chrome=1" />
<meta name="robots" content="all" />
<meta name="robots" content="index,follow"/>
</head>
<body>
<script type="text/javascript" src="http://www.qq.com/404/search_children.js" charset="utf-8" homePageUrl="your-site-url" homePageName="回到我的主页"></script>
</body>
</html>
图片显示
把图片放到图床或source/images目录下
访问量统计 与 网站运行时间
这里使用 不蒜子 提供的服务
在 next/layout/_partials 中的 footer.swig 文件中添加<script async src="https://dn-lbstatics.qbox.me/busuanzi/2.3/busuanzi.pure.mini.js"></script>
<div>
<span id="showDays"></span>
<span id="busuanzi_container_site_pv">
总访问量<span id="busuanzi_value_site_pv"></span>次
</span>
<span id="busuanzi_container_site_uv">
访客数<span id="busuanzi_value_site_uv"></span>人次
</span>
</div>
<script>
var birthDay = new Date("11/20/2014");
var now = new Date();
var duration = now.getTime() - birthDay.getTime();
var total= Math.floor(duration / (1000 * 60 * 60 * 24));
document.getElementById("showDays").innerHTML = "本站已运行 "+total+" 天";
</script>
添加README.MD
把 README.MD 文件的后缀名改成 MDOWN, 放到 source 文件夹下, 这样 Hexo 不会将其解析成网页, GitHub 也会作为 MD 文件解析